Introduction
The 3D technologies are becoming more popular nowadays. Cheap 3D printers are available even for students, not to mention engineers, designers or architects. Turning to the methods of obtaining 3D models of real objects, an expensive laser scanner has been required for such purposes so far. However, there is a relatively simple way to "scan" an object to get a 3D model using a conventional digital camera. This article will tell about how to scan a room, create a 3D point cloud in Agisoft Photoscan and import the resulting point cloud into GRAPHISOFT Archicad to create a model.
Photogrammetry
Photogrammetry is a scientific and technical discipline that allows to determine the spatial position and characteristics of objects (such as shape, dimensions, etc.) by images.
PhotoScan implements the Structure From Motion (SFM) approach. This is the technology of determining the distance (distances) to the subject with use of several flat images. It refers to the field of computer vision and visual perception. From a biological point of view, SFM technology is similar to how humans (and other living beings) perceive volume over the flat projections of a moving object or scene on the retina.
PhotoScan automatically searches and compares tie points on several overlapping images and determines the exact position and orientation of cameras, lens distortion parameters and 3D coordinates of points.
Advantages
Compared to other methods of 3D-scanning, the work of shooting and processing of the photos is relatively simple. Important advantages of the photogrammetric method are the speed of obtaining the necessary information; the reliability and the objectivity of the data; economic efficiency; high level of automation.
Disdvantages
Sensitivity to the quality of images. Dependence on lighting conditions. Requires compliance with the survey methodology. The presence of noise. The accuracy is lower than that of the LiDAR.
Survey recommendations
Despite the fact that the survey rules are the same for all photogrammetric software, there are special recommendations for different applications, because each program processes the data in its own way. The recommendations described below make it possible to achieve the maximum quality of processing in Agisoft Photoscan.
The room should be well lit. All furniture and other items, which coveer walls, floor and ceiling, like curtains, it is advisable to remove them before starting the survey. It is desirable to use the camera with a high sensitivity and minimal noise in the pictures at high ISO values. The lens should be with autofocus. Set the aperture settings so that all the details of the pictures are as clear as possible.
If it is possible to survey at least 3 rows in height with an overlap of 70% or more, the top row can be surveyed by using a pull-out tripod with a height of 2 meters or a construction ladder. Take photos perpendicularly to the surveyed surface from each point, and also tilt the camera in both directions - horizontally and vertically. In case there are smooth and uniform surfaces in the room (smooth white ceiling, smooth painted walls), it is necessary to survey in such a way that there are characteristic points in the frame, which are present in neighboring pictures. Try to avoid frames, on which there is nothing but a flat, one-color surface. If thera are decor and other small elements in the room, it is necessary to shoot additionally with a long-focus lens or from a short distance.
In purposes of creating conditions of uniform lighting in this project, powerful cold-colored hangar lamps were used on tripods with reflectors. Reflectors allow to concentrate the light stream along the wall, right where the lamp stands and protect the camera lens from direct rays.
PhotoScan
Agisoft PhotoScan Professional allows to generate georeferenced dense point clouds, textured polygonal models, digital terrain/environment models and orthophotos based on overlapping photos and information about geographic coordinates.
Processing
The main stages of the processing for preparation of dense point cloud are:
1. Images import;
2. Masks overlay;
3. Search for common points, alignment and creation of the sparse point cloud;
4. Dense point cloud creation;
5. Markers and scale rulers placement;
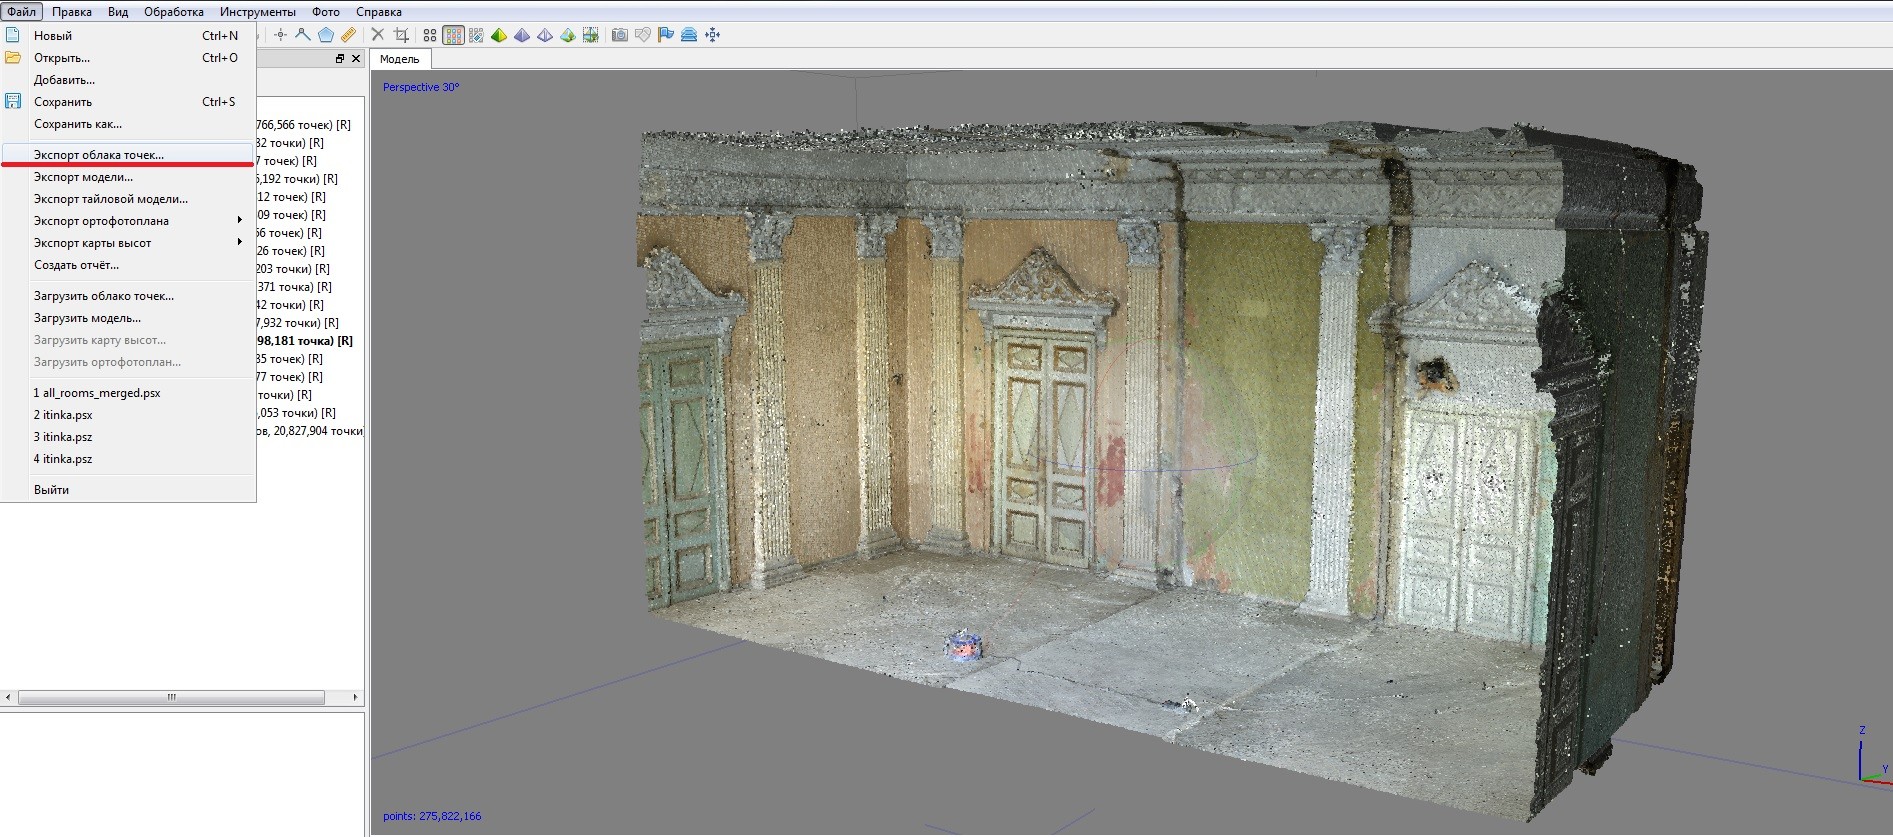
6. Point cloud export.
Processing settings of the current project:
Total images: 655 Resolution: 0.597 mm/pix Canon EOS 5D Mark III
Processing parameters:
Cameras - 655
Markers - 7
Scale rulers - 2
Coordinate systems - Local Coordinates (m)
Point cloud:
Accuracy - High
General preselection - Yes
Preselection by reference - No
Max. number of points - 120,000
Max. number of projections - 0
Filter matches by mask - Yes
Dense point cloud:
Points - 398,706,284
Reconstruction parameters:
Quality - High
Depth maps filtering - Moderate
1. Images import:
To add photos, select in the "Processing" - > "Add" ... or click the "Add Photos" button on the "Project" tab in the work area of the program. Specify the path to the photo folder in the "Add photos" dialog box, select the files that you want to add, and click "Open".
2. Masks overlay:
In order to achieve the best results of the reconstruction, it is recommended to mask all insignificant objects on the original photos (background, random foreground, etc.). The masks in PhotoScan are contours that outline certain parts of images. Correction of the current masks is possible in the "Photo review" mode by adding and subtracting the selection. The areas masked by the mask can be ignored during the "Align photos" processing stage(to do this, activate the "Use mask" option to filter the correspondences in the "Align photos" dialog box) and are always ignored in the "Build dense cloud" and "Build texture" stages.
3. Photos alignment:
At this point, PhotoScan determines the camera position and builds a sparse point cloud based on the photos. In the "Processing" menu, select "Align photos". In the "Align photos" dialog box, set the following settings: "Accuracy" (high accuracy allows you to calculate more accurate camera positions, while low can be used to calculate approximate camera positions in a less time), "Pairs preselection" (for fast alignment of a large number of photos, use the value of the "General" parameter), "Use the mask" to filter the matches ("Connected" - if the mask overlaps moving objects, for example, clouds, or "Not connected " - if all about the mask remained motionless during the survey), "Max. number of points", "Max. number of projections". Click "OK" to start the alignment process. At the end of the alignment stage, adjust the size and position of the building area according to the features of the object; this step can be skipped, because PhotoScan automatically calculates the size and position of the building area. However, it is recommended to assuere that the object is inside the entire building area, because at the next stage - "Building geometry" - only cloud points inside the building area are taken into account. To change the size and orientation of the building area, use the "Resize area" and the "Rotate area" buttons on the toolbar.
4. Building a dense point cloud:
Basing on the calculated positions of the cameras, the program calculates depth maps for each camera and builds a dense point cloud. On the "Processing" menu, click "Build a dense point cloud". In the "Build dense point cloud" dialog box, set "Quality" (the higher the desired quality, the more time and resources will be required to complete the stage), "Filter depth maps" (if the geometry of the reconstructed scene is complex, abundant and small-detailed, it is recommended to set the "Soft" parameter value to preserve important details during the building, in other cases, ser the "Aggressive"). Dense point clouds can be deleted with use of the selection tools and the "Remove selection" / "Cut selection" buttons on the toolbar.
5. Placement of markers and scale rulers:
For georefefencing of a model in Photoscan markers are used. They are placed on the characteristic points of the model. It is enough to specify 3 markers with known coordinates for orientation and scaling of the model.
To create a marker on the model, you must right-click in the desired place of the workspace and in the appeared dialog box select the "Create marker" item. You can also create a marker directly on the image and specify its position on adjacent stereopairs. After placing all the markers, you need to specify the XYZ coordinates of each marker.
To create a scale ruler, select two markers corresponding to the ends of the ruler in the "Model" view area using any of the available selection tools and hold down the Ctrl key (you can select the marker with the left mouse button). Then select the "Create a scale ruler" in the context menu, which is called by pressing the right mouse button in the model view area or on the "Project" tab. Repeat the operation for each pair of markers, for which the distance between the markers is known. Specify the length of each scale ruler in the "Reference" panel: tick all the scale rulers that you want to use to specify the model scale and click the "Update" button. The model will be scaled.
6. Export point clouds:
Export of a dense point cloud is performed in the local coordinate system. With a large number of points it is recommended to split it into parts. The export formats are e57 or XYZ.

ArchiCAD
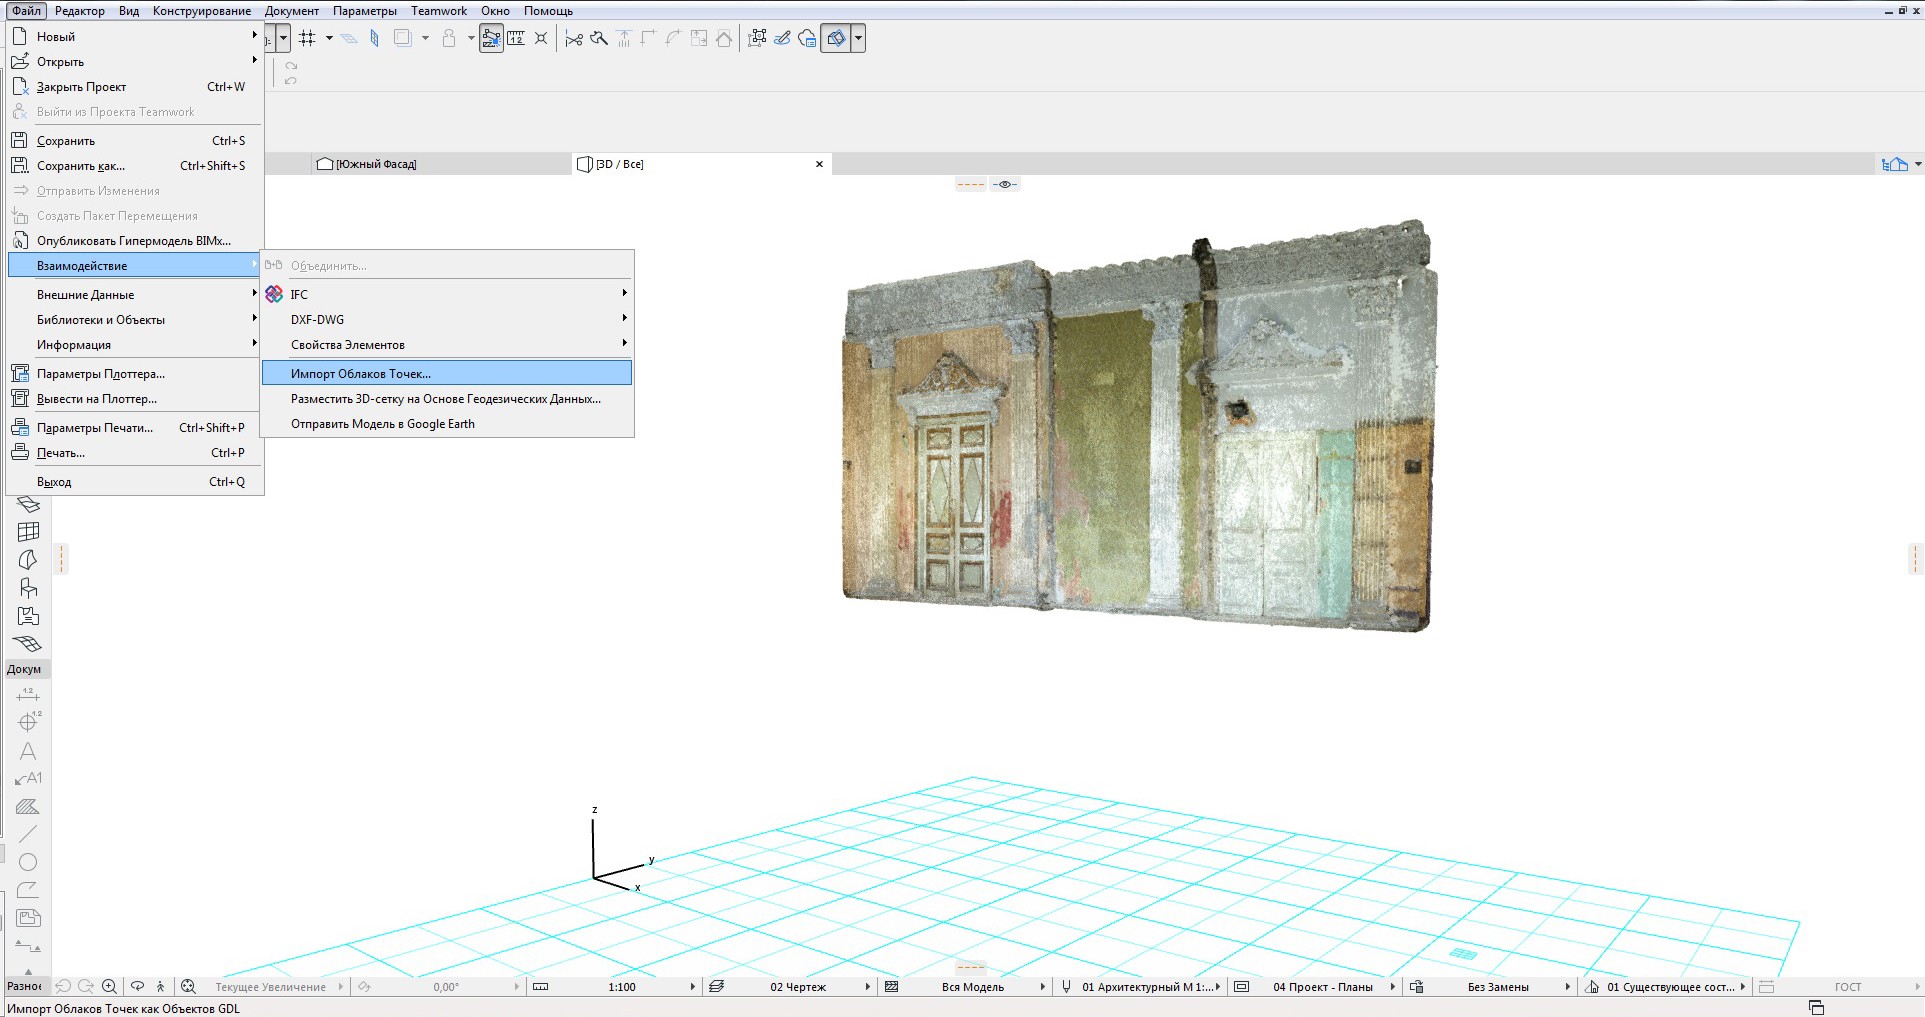
Import
Importing a point cloud of an entire room, containing 400 million points, at a size of about 3 GB on a computer of a medium power, takes a long time or leads to a complete "freeze" of the system. In case of successful import, it is not convenient to work with such a cloud because of the slow visualization during rotation or zooming. Since simultaneous loading of all points is not required for modeling a room, it is advisable to split the cloud into separate parts. It speeds up the import and allows you to work comfortably in Archicad.

Placement
The imported point cloud can either be automatically placed at the starting point of the project coordinate system, or its position may be manually specifyed by use of an anchor point. If necessary, you can move it at any time. This function is useful when importing several point clouds and linking one to another (Importing a cloud when measuring rooms, then combining all the rooms).
Treatment
Simulation on the point clouds is performed either by primitives, or by using the Morph tool. It is convenient to use a 3D cross-section in order to hide a part of the cloud that is not used yet.


It is also possible to import a point cloud and turn it into an ARCHICAD 3D tool.
Conclusion
The photogrammetric method of obtaining a 3D point cloud is much more accessible than the method of laser scanning. For architects, the presence of such a foundation significantly simplifies the creation of a model in the ArchiCAD system. It is important to monitor the size of the cloud. Better to break it into small ones and work with them separately.
For mor Agisoft PhotoScan manuals and tutorials follow by the link.