Before reading this article we recommend you to familiarize yourself with the method of obtaining vegetative index maps using GIS Sputnik Agro.
Users of "Geoscan" complexes have two options for calculating NDVI index: using GIS Sputnik Agro or with the use of "Raster Calculator" tool in Agisoft PhotoScan. it should be considered that Agisoft PhotoScan doesn't support Sony RAW (*.ARW) format, so before uploading photos to the project they must be converted, for example, to the TIFF format.
ARW to TIFF conversion
The conversion of the photos into TIFF format can be performed in GIS Sputnik Agro. There is a step-by-step instruction below. If you previously performed the NDVI calculation with the Sputnik Agro and you have a Photoscan project with the uploaded data, skip this section.
1. Launch GIS Sputnik Agro. Import aerial photos using «File» – «Import» – «Aerial photos...». Select the folder, containing the photos and the georeference file.
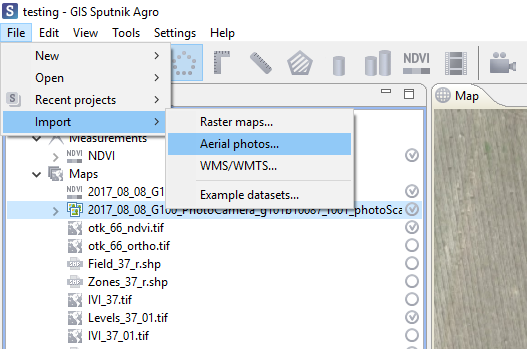
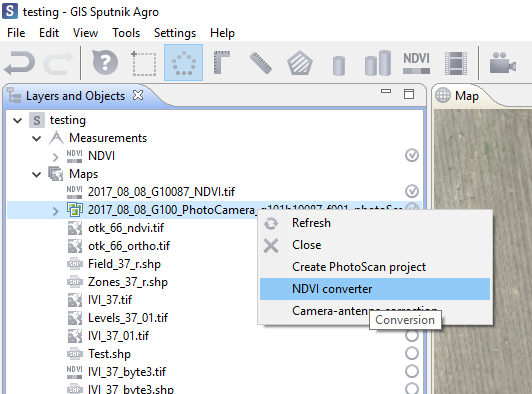
2. In «Layers and Objects» the appropriate object will appear. If it is required to convert all the aerial photos, select the «NDVI converter» from the context menu inside the «Layers and Objects» panel:
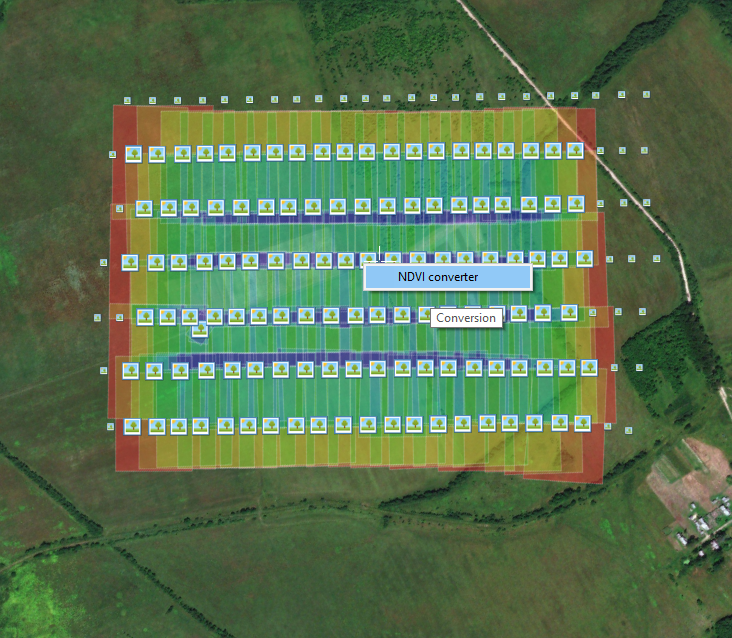
3. If it is required to process only a part of the flight, select the desired area with the «Rectangular frame» tool and call the «NDVI converter» from the context menu by clicking on the aerial photos icons:
4. Select the desired area on the calibration plate in the appeared window.
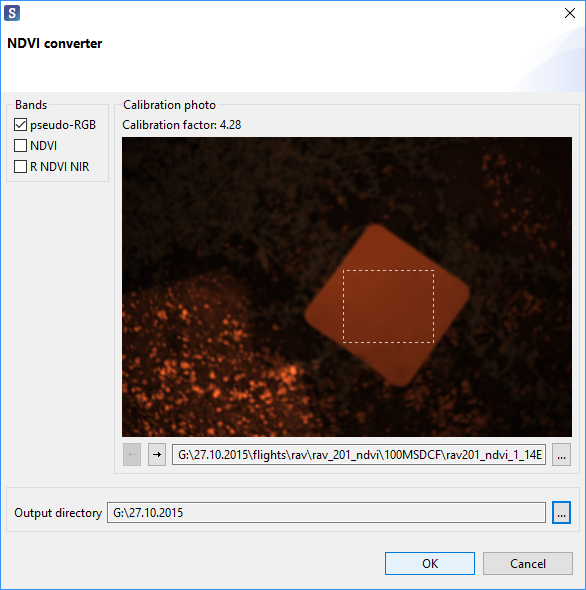
In this manual an example of use of the PhotoScan raster calculator is considered; the only combination of channels that should be marked in this window is "pseudo-RGB". Resulting files are three-channel 16-bit TIFF images.
5. Clicking the «OK» button will start the photos conversion.

After the completion, several new objects will appear in the «Layers and Objects» window (by the number of selected checkmarks). Select the photos set from the «rgb» subfolder.
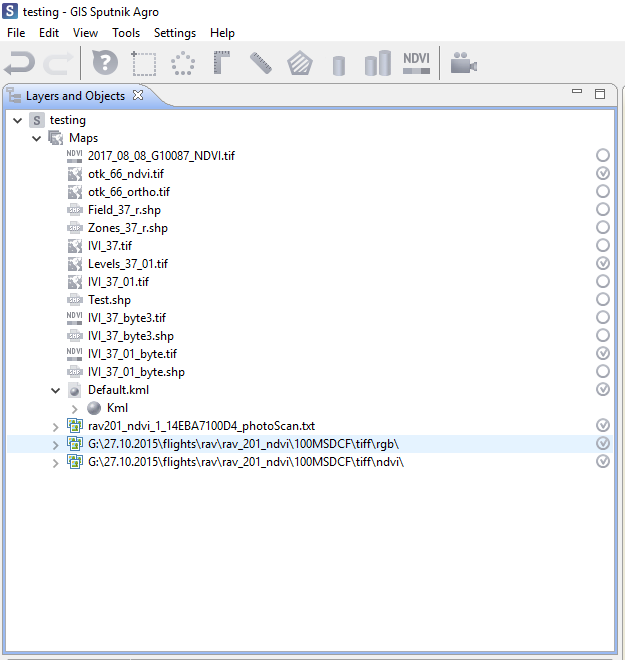
6. In «Tools» menu select «Create PhotoScan project» (or in the context menu by right-clicking on the layer ).
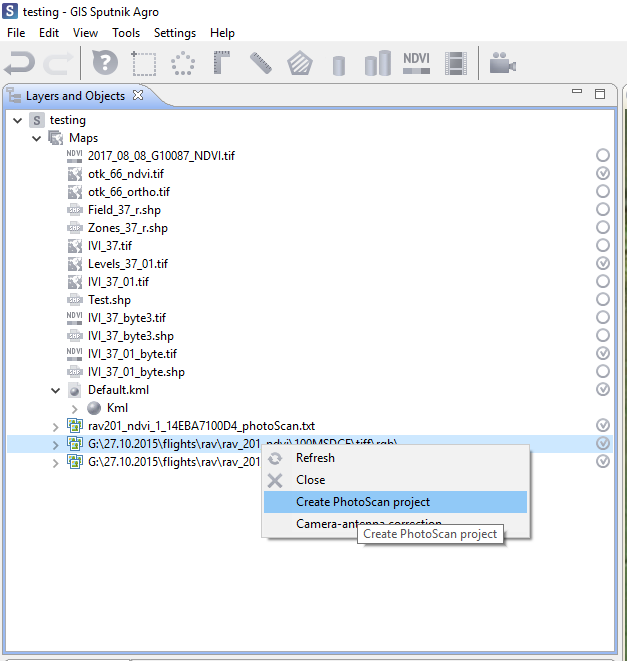
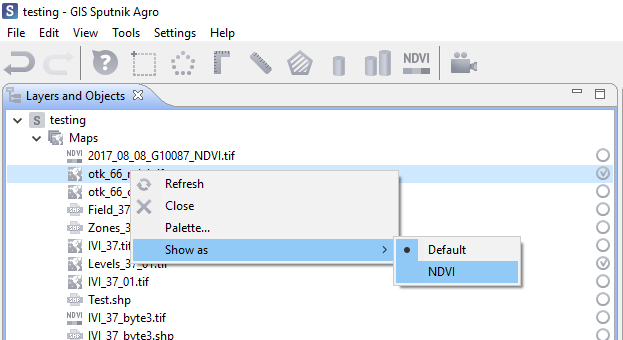
7. After completion GIS Sputnik Agro will offer to open the project in PhotoScan.
Data processing in Agisoft PhotoScan, raster calculator use
A detailed manual on working with Agisoft PhotoScan can be found in the user manual.
Processing of TIFF images, obtained after conversion in GIS Sputnik Agro is not much different from the processing of conventional images. Therefore, we list the general processing steps without a detailed description.
1. If the "Create PhotoScan project" function was used in GIS Sputnik, then after opening in PhotoScan a separate chunk will be created in the project, with added photos and imported georeference. Otherwise, create a new project, add a chunk, add the photos obtained after the conversion (they are stored in the "/ rgb" subfolder of the original photos folder).
2. Align photos: «Workflow -> Align photos»
3. If necessary, optimize camera alignment: «Tools –> Optimize camera alignment»
4. Survey data which is obtained with the modified for infrared surveying camera is suitable for building the height field. If the detailed height map is required, it is reccomended to build the dense point cloud. If the height field is nor required, then this step may be skipped.
5. Regardless of whether the height field will be used in the future or not, it is necessary to perform build, because the result is used for the orthophoto creation.
6. Build the orthophoto: «Workflow -> Build Orthomosaic».
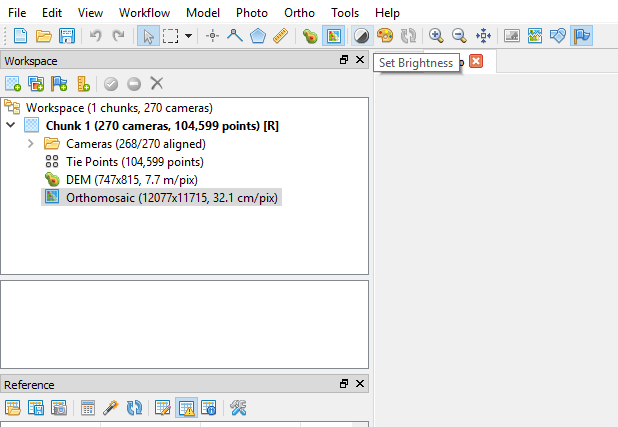
7. In the project tree, select the orthomosaic. If the image is too dark, use the "Set brightness" function. This is a visual effect, which does not affect either the result of raster transformations, nor the result of export.
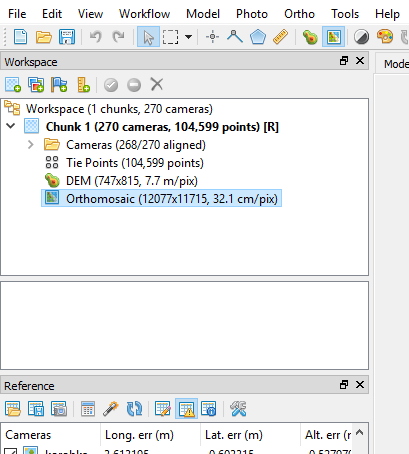
8. Open the raster calculator: «Tools -> Raster Calculator». On the first tab («CIR calibration») no actions are required.
9. On the «Transform» tab formulas for raster operations are defined. Further, it is assumed that the photos are taken from Geoscan 201 Agro with modified Sony A5000 camera with installed red filter. In this case, the red channel corresponds to channel B1, and the near-IR channel corresponds to channel B3.
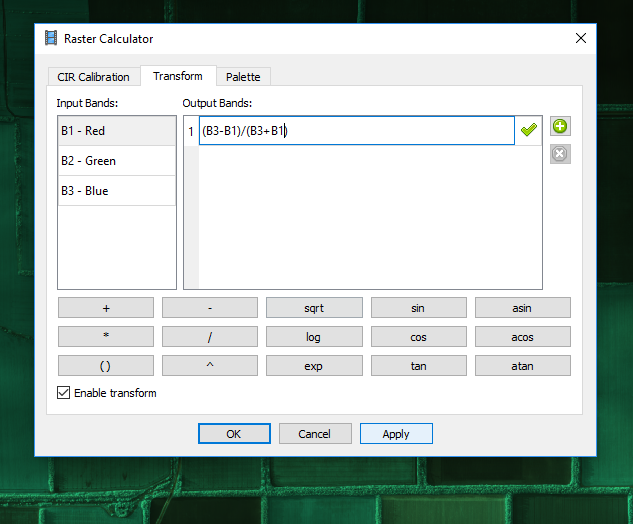
Examples:
-
(B3-B1)/(B3+B1) – corresponds to the clssical NDVI formula;
-
B3 – only near infrared channel;
-
B3/B1 – Simple Ratio Vegetation Index.
10. At the bottom of the dialog box select the «Enable Transform» check box. Click «Apply».
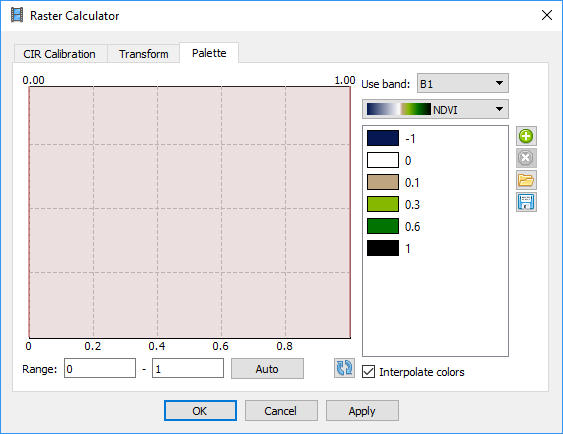
11. Click the «Palette» tab. By default, a single-color paletter is used. For working with vegetation indices, the NDVI palette is used.

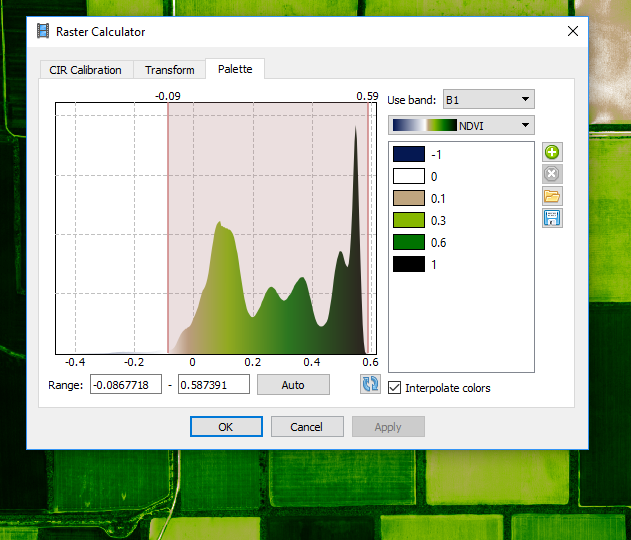
12. Specify the limits of the palette's range of applications by selecting a part of the histogram with the mouse or specifying them in numerical form. If the histogram is not visible, click the button ("update").
13. If the NDVI index is used and the range limits are chosen correctly, then the open water will be colored in shades of blue, the open soil will be in shades of brown, and the photosynthetic vegetation in shades of green.
14. Export of an orthophoto can be made in several ways:
-
As a colored image. To do this, specify the "Index color" in the "Raster transformation" parameter in the orthomosaic export dialog. The images obtained in such way are suitable for displaying even in standard viewers.
-
As an indexed image. If the rasters are exported for further analysis in GIS, including the construction of Shapefile vector maps in GIS Sputnik Agro, this option is recommended. In the orthomosaic export dialog for the "Raster transformation" parameter, specify the "Index value". In this case, the palette is not applied to the raster, and if necessary, the coloring will need to be performed by the used GIS.
More information on application of GIS Sputnik is available by the link
