Data obtaining
- Before the flight, do not forget to check the camera settings. The recommended parameters are specified in the user manual of the complex. Unlike "conventional" cameras, the cameras for such surveys should be specified by the following settings: quality RAW, ISO 200-400, EV +1.3..+2. Also, do not forget to format the memory card.
- Before the flight it is necessary to take a photo of the calibration plate. This can be done, for example, at the stage of checking the camera during the flight preparation. There may be at least two options for taking photo of a calibration image. The first is "on reflection":

The second way is "pass-through". When using this method, the camera is removed from the lodgment, the lens is oriented upwards (to the sky), the plate is laid directly on the lens. The image from the camera is as follows:

Depending on the camera settings, the photo may be darker and have a color tone different from gray. Performing a "pass-through" calibration photo is preferable, since the camera can not auto-exposure. - When determining the flight task, it is necessary to take into account that the resolution of the received NDVI map will be two times lower than calculated by Geoscan Planner: while converting RAW for calculation of vegetation indices, the spectral characteristics take precedence over spatial resolution and pixel interpolation is not used.
- After the landing, it is necessary to compare the photos with the coordinates of the photographing centers.
Processing
- Launch GIS Sputnik Agro. Import aerial photos in the menu "File" - "Import" - "Aerial photos...". Select the folder containing the pictures and the coordinate text file.

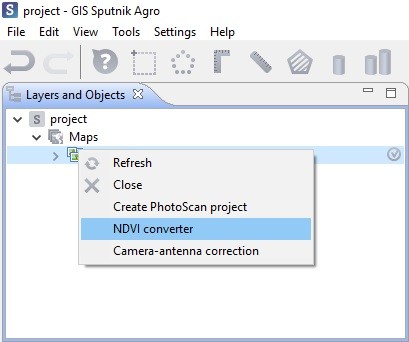
- The corresponding object appears in the "Layers and Objects" panel. If you want to convert all pictures from a flight, call the "NDVI converter" function from the context menu inside the "Layers and objects" panel:

- If you want to process only a part of the flight materials, select the desired area with the "Rectangular frame" tool and call the "NDVI converter" from the context menu by clicking on the aerial photos:

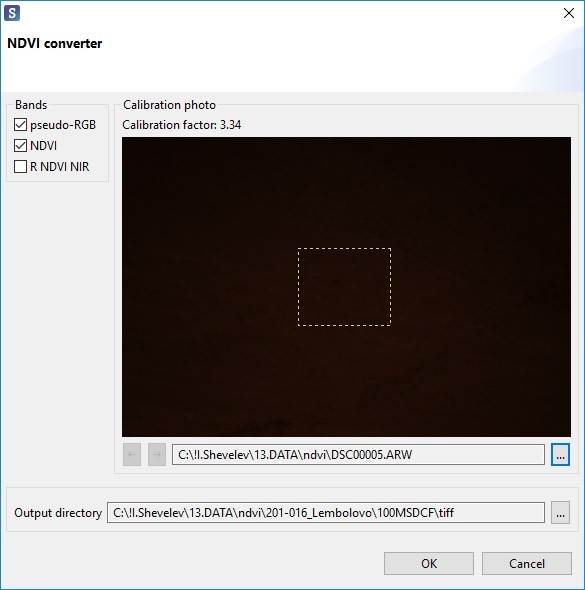
- In the appeared window, select the area on the calibration plate

Possible channels combinations:
-RGB («pseudo-RGB») – the channel is suitable for alignment, photorealistic images creation, 3-channel 16-bit TIFF.
-NDVI – channel is not suitable for alignment, it is needed to be used in pair with pseudo-RGB. Index images, 1 channel, 8-bit TIFF.
-R NDVI B – The channel is suitable for alignment, but is not suitable for GeoTIFF export. 3-channel, 16-bit TIFF. It is used for KML export, with mandatory indication of the main channel when aligning. - By default, the checkmarks are set to "Pseudo-RGB" and "NDVI".
- Pressing the «ОК» button starts the photo conversion.

- After the process is over, several new objects appear in the "Layers and Objects" panel (by the number of selected checkmarks). Select the set from the "rgb" subfolder.
-

- In the "Tools" menu (or from the context menu), select "Create PhotoScan project".

- After the creation, Sputnik will offer to open the project in Photoscan. Open it.
- To export an index orthophoto, it is necessary to change the path to the photos after alignment and before creating an orthophoto. To do this, you need to select any photo in Agisoft PhotoScan, right-click on it and select "Change Path..." in the context menu. In the file selection menu, go the folder up, go to the ndvi folder and select the file with the index image:
-


- In the appeared dialog select «All cameras» and «OK». After that the orthophoto creation stage may be started.

- It is recommended to export orthophoto in GeoTIFF format.
Visualization
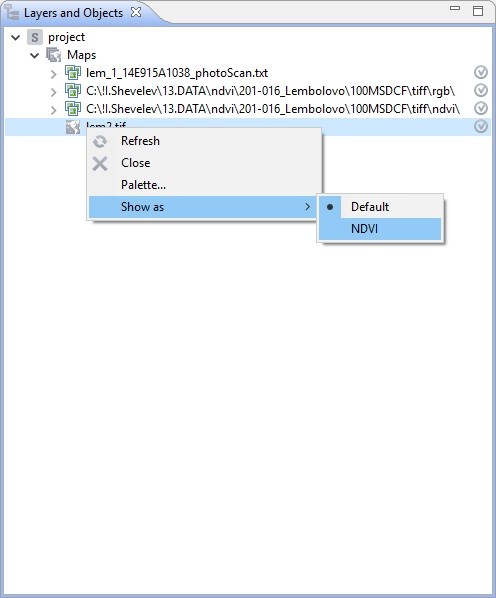
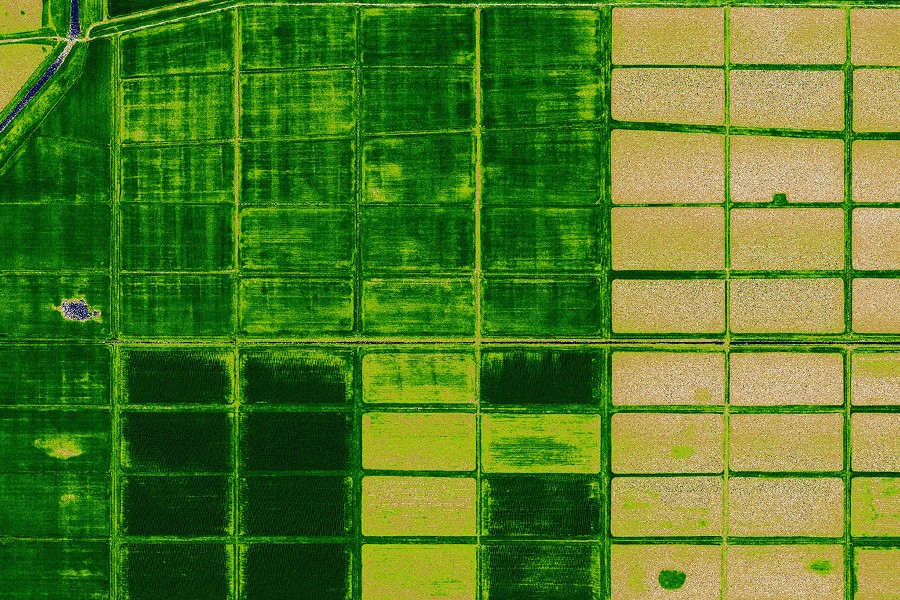
In GIS Sputnik Agro index GeoTIFF image, which is an NDVI map, by default it will be displayed in black and white. For coloring by the palette, you must select "Show as - NDVI" in the context menu:


You can also read an article about NDVI data processing in Agisoft PhotoScan. To learn more about application of GIS Sputnik follow here
